|
Wan
ala}um ilan ana}im an}a}inangin usuu Aguu}u{ agach ngiin a}iqaa.
(E)
|

The growing season in this region is short as well as cool. Plants must use all warmth to survive and to mature enough to produce new plants. Cold is one the conditions of northern life for which plants must be adapted to survive. In the winter, plants save energy by becoming dormant or inactive through the long cold months.
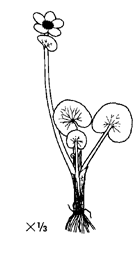
Some flowering plants, especially those with bowl-shaped flowers act like solar catchers. They form warmer temperatures on their surfaces than that of the surrounding air. The Papaver alaskanum (Alaska poppy) is an example of this kind of plant.
|
|
|
The catkins of Salix arctica, a willow, warm up in the sun. Their dark color lets them absorb the sun’s warmth. Scientists think that their hairs act like little greenhouse windows. Scientists have measured female catkins approximately 40° F (4-5° C) warmer than the surrounding air. Some plants adapt to the cold and short growing season by making leaves that are green all winter. These wintergreen leaves give the plant a jump-start on growth in the spring. Old leaves don’t die until the plant makes new ones. Many members of the Heath Family have leaves that stay green all year. The plants use less energy because new leaf growth is not required every year. Some evergreens such as Phyllodoce aleutica, Aleutian heather, can survive even when another part of the plant freezes. |
|
Annuals are the least adapted flowering plants for the short growing season. These plants go through their whole life cycle in one growing season. They die before winter sets in, and are not commonly found in the Aleutian/Pribilofs. Most flowering plants in this region are perennials. Perennials live for several years, flowering each summer. Some perennials grow their flower buds in late summer. The buds winter-over. As soon as spring temperatures are warm enough, they will blossom. Some plants are biennial, growing for two years. In the first summer they grow leaves, They build up their roots, storing sugars before they rest for the winter. With the second growing season, they are ready to grow early and make flowers and seeds. Among the many adaptations to the cool, short growing season are the ways that plants reproduce. Some plants have seeds that blow away in installments. If all the seeds were blown away at the same time, they might end up in a place that was not welcoming for the plant to grow. |
|
|
Seeds spread by strongest winds (gale-force) are usually round and smooth like tiny peas. They may end in a snowdrift along with dust blown by the wind. This little soil pocket gives a cozy home for the new plant to grow in after the snows melt.
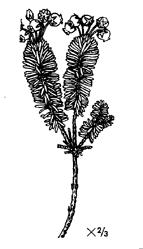
Seeds spread by gentle winds are more likely to have fuzzy feather-like forms. Fireweed and cotton grass are examples of these.
Many seeds are spread by Arctic animals such as lemmings, voles, and birds. Berries are an example of this kind of seed spread.
|
|
|
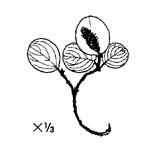
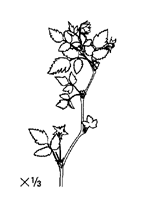
Ranunculus bongardii, bongard buttercup, sometimes known as the rain flower, has long hooked beaks on its flattened seeds which stick to animal fur and our own socks and pant legs. Other plants with bristly seeds are Geum macrophyllum, large-leafed avens, and Galium aparine, bedstraw. Some plants do not depend on seeds to grow. Some plants spread by roots that break off and create a new plant. The chocolate Lily has rice-like bulblets that come apart and make new plants. Some plants have underground stems that make new plants. Examples are Artemisia unalaskensis, wormwood, and Rubus spectabilis, the salmonberry. New plants grow at the ends of some plant branches. Potentilla egedii, silverweed, and Fragaria chiloensis, Pacific beach strawberry, are examples. Some form new plants at the nodes of the stems where the leaves connect. Caltha palustris, marsh marigold, reproduces this way. |
|
Bistort and several saxifrages spread by little buds that become detached and sprout. The little buds have the advantage of traveling like a seed, but do not have the seed’s advantage of being able to be dormant through the long cold. Plants have many ways of reproducing, but seeds are the most common way in most of the world. The seeds of plants called angiosperms are contained in fruits. (Another group of plants with seeds are trees that carry their seeds in cones. They are known as gymnosperms. Are there any gymnosperms where you live? ) Fruits come in many different forms. Speaking botanically, a “fruit” is the mature, ripe part of the plant that contains the seeds. A fruit is often brightly colored and sweet to taste. An apple is a fruit. But a fruit can also be a tomato, a green bean, a pea pod, a seed of Geum macrophyllum or Galium aparine. Seeds need 3 things to grow:
|
|
|
|
aadumaanu{
(UT 14)(aa thoom AAH noh): oval
achiigusaada{ E (UT 105) (a cheegh oo SAH thah): flat
anguna{ (p 91) (ung OO nah): large atxa{ (UT 108) (ATK ah): smooth bruudnax [r] (p 123) (BROOD neh): 2 boots chi}uudngim qadungin E (UT 293) (chih ROOTHE ngim • kahthe OONG in): seeds, lit. flower scabs chuchxulalix E (UT 149) (chuchk oo LA lih): thorny
chuhnisas W (UT 154)
(choon EES us): hooks chuqudaachxuza{ W (UT 156) (chuh ku thawch KOO zah): microscopic chuulki{ [r] (UT 153) (CHOOL kegh): sock
daa{sxituud(a)lakan E (UT 160) (thah skit toothe LA kan):
small
da{sxi{ W (UT 160) (THAH skegh): grain, seed hitxuli{ (UT 215) (hit HOO legh): seed, crumb kumatxa{ E (UT 248) (koo MAHT kah): fox skin sock qaasa{ E (UT 311) (KAAH sah): seed qala{ (UT 302) (say KAH-lah): seed
qach{idiga{ E (UT 292) (kach kidth IG gah): smooth
qalaa (UT 301) (kah LAA): bottom
qihmadgu{ E (UT 43, 324) (kih MOTHE goh): round
siima{ E [r] (UT 361) (SEE mah): seed
tngu{ E (UT 400) (tng oh): hard uliigin (UT 436) (ool EEGH in): mukluks, skin boots usxim inguqala}ii E (UT 209) (oos kim • ing oo KAHLAH ghee): having many needles
|
![]()
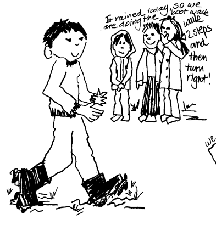
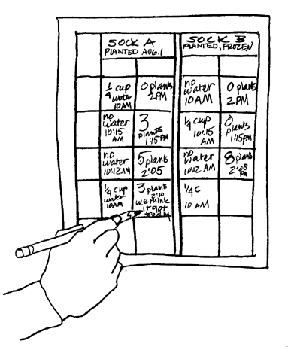
ACTIVITY ONE. You can find seeds with your socks or your boots. Dirty a Sock/ Clean a Boot
If the weather is dry, 2 students will be designated as sock walkers for the class and will be given directions to take a walk in the meadow with their socks on! Each color team gives a 2-sentence direction to the walker that includes no more than 10 steps in each direction. Example: “Turn right and walk 7 steps. Then turn right again and walk 4 steps.” After walking in the meadow, their socks will be planted!
|
|
|
Put the socks in a plastic bag to carry them back to the classroom without losing any seeds. If the weather is wet, 2 students will be designated as boot walkers for the class and will be given directions to take a walk in the meadow in a muddy place! Each color team gives a 2-sentence direction to the walker that includes no more than 10 steps in each direction. Example: “Turn right and walk 7 steps. Then turn right again and walk 4 steps.” After walking in the meadow, the mud from their boots will scraped off and planted! Put the boot mud in a plastic bag to carry it back to the classroom without losing any seeds.
|
After returning to class, you will be in organized into committees:
PLANTING COMMITTEE,
CARETAKER COMMITTEE,
and each student also works as an OBSERVER.
Each student will be responsible for one or more days of observation. You will know when you are an observer because your name will be on the Seed Calendar.
Each day’s observations will be witnessed by a representative from the PLANTING COMMITTEE and the CARETAKER COMMITTEE. If the assigned OBSERVER is absent, the COMMITTEE representatives will do the observer’s work.
SOCK AND BOOT DIRECTIONS ARE IDENTICAL EXCEPT FOR THE LABELS
PLANTING COMMITTEE: Directions
-
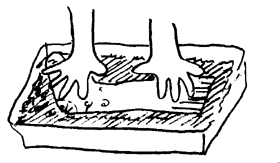
Spread a layer of soil on the bottom of each of 2 planting containers.
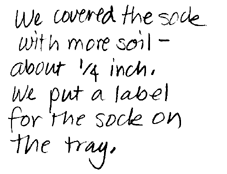
Lay each sock on the soil in a container. Cover each sock with more
soil, approximately 1/4 inch (6 mm) deep. Fill a measuring cup with
water and then water the soil so that it is damp, but not soaked. Note
the amount of water you used so that you can record it in steps “b”
and “c” below. Cover the top of the container with clear plastic
food wrap to help hold in the moisture. Using a waterproof marking pen,
write SOCK A or MUD A on a label that you fasten to one container and
on another label write SOCK B or MUD B.
-
On a piece of paper, write SOCK A or MUD A and the date and time you
planted the sock. Put the paper on a clipboard or staple it to a piece
of cardboard. Set the container near a sunny window in a warm—not
hot—place. Place your recording paper with the container.
- On another piece of paper, write SOCK B or MUD B and the date and time you planted the sock. Then Put SOCK B or MUD B in a freezer and record the date and time you put the sock in the freezer. Put this recording paper near the freezer.
WHOLE CLASS:
Predict what you think will happen in container A. In 8 days you will remove B from the freezer. What will happen to it? Will there be a big difference in the growth in the 2 containers at the end of 4 weeks? What do you predict that growth will be?
  |
  |
  |
OBSERVERS: Directions
- At the same time each day for 4 weeks, you should look at each container. Notice the rate of growth for container A and container B. How many plants are growing? How tall are the plants?
- Record the growth on the recording papers for each container—how many plants and how tall each plant is. Write the date and the time of your observation.
CARETAKERS Directions
|
|
|
WHOLE CLASS
At the end of the 4 weeks, what are the differences, if any, between SOCK A and SOCK B? Or between MUD A and MUD B? What signs of growth are there? Which has more sprouting plants? Why? How did the results match your prediction?
![]()
ACTIVITY TWO You can learn about seeds and Unangam tunuu words.
During this project you will use 3 languages: Latin, Unangam tunuu and English. Latin is the language of Science. It is used to help people all over the world know that they are talking about the same plant or animal. A plant name is included in Unangam tunuu, if available, because that is the language native to these islands. Some common names in English are also included. Common names for plants are fun to learn, but can be confusing. Sometimes people in different places have the same name for different plants. (Remember the different rain flowers in your region?) This happens in all languages. When a plant is given its Latin name, care is taken to be sure of the plant’s identity. That is why the Plant Illustration Cards list a Latin name for all plants. You can learn to be sure of a plant’s identity.
Scientists must be good observers. They must be careful with the living things that they study. If people are careless, many plants and animals could easily disappear. This is especially true on a small island. This activity gives you a chance to think about taking only what is needed. Take only what you need so that you will be able to complete the activity. An Unangam value reminds us to “live with and respect the land, sea and all nature.” It shows great respect to learn about the living things around you.
STEP ONE Seed Gathering and Identification.
|
1. Using a Plant Illustration Card, look for that plant’s seeds in a habitat area. Work with your team to find the seeds. 2. To help be sure of the seed’s identity, collect other plant parts. Collect leaves, flowers—if still on the plant—,seed pods, and the stem with leaves attached. Suzi Golodoff, botanist, reminds us that if the plant is at seed stage, its flowers will be gone. Ask yourself, “Do I know this plant’s flower?” Often plants go through amazing changes. You might not recognize the plant at seed stage. Coastal paintbrush is one example of this change. Wild geranium is another example. These plants look very different in seed stage. 3. As you collect, take notes about your seeds in your log book. What kind of habitat were you in when you found the seeds? How tall was the plant? If you have Elders or other experts with you, write down all the information they tell you about your plant. 4. Put all samples from a plant in one bag, with seeds and seed pods in a smaller zip-loc inside. Make sure nothing falls out so that it is not wasted or mixed with other seeds. 5. Before you leave the habitat area, compare bags of seeds. Hopefully, there will be as many seeds as there are people in your class. No 2 bags should contain the same kind of seeds, unless you are given permission. However, there will be years or areas where it will be difficult to find 25 or more different seeds to collect at the same time. If your teacher gives you permission to collect seeds that are not on any Plant Illustration Card, plan to use all available resources to identify those plants. |
|
|
6. When you return to the classroom, form a talking circle to share what you know and to decide how to find out what you still need to learn.
7. When you finish with the seeds for the day, open all zip-locs and undo any twisties so that plants will not mold. Print the name of your seed on a paper lunch bag, and put the plastic seed bag in it. Fold the top of the paper bag and put a paper clip on top so that it won’t spill. Put the paper bags where they will be safe.
STEP TWO. Observation and Sketching.
Your teacher has given you a single seed that you will get to know intimately. Everyone will have a different seed.
1. Quickly draw a sketch of your seed.
2. Examine your seed carefully. Use a hand lens to see details. Then make a second sketch showing all the details you see. Draw the details so accurately that no one could confuse your seed with another seed.
3. Write your seed’s plant name on your sketch. Write it neatly in Latin, Unangam tunuu and, if you wish, English. If you cannot find a name for your plant in Unangam tunuu, use a descriptive word. You will find those words on the Unangam tunuu list posted in the classroom.
4. Record all the Unangam Tunuu words that describe your seed.
STEP THREE. Plan and Produce the Poster.
1. Plan your final poster. Your poster will contain:
- A large, well-drawn representation of your seed; and
- Words about your seed in 2 or 3 languages (Latin, Unangam tunuu, and English).
Use large, unlined newsprint, and crayons or colored pencils to make your plan.
Plan your design and spacing:
Use the paper well. Arrange the drawing and text on the page in a way that pleases your eye.
A. Practice the lettering you want to use. If you are not satisfied, figure out what you could do to improve the poster design, and try a second or third version.
B. Fill all the background with words and designs. There should not be much unused background showing.
C. Consider ways to contrast the seed and the text:
- Outline your seed drawing on the poster in a color such as black so that it stands out.
- Paint your seed in more than one color and let the text stand out in a bold color or black.
- Paint your seed in unexpected colors. Your seed is not required to be the same colors as in nature.
D. Consider ways to place your words:
- in straight horizontal lines, or
- around the edges of the drawing, or
- floating in wavy lines, or
- swirling in a spiral around your painted or outlined seed drawing, or
- in other ways you can imagine.
E. Make sure that all words in all languages are correctly spelled.
Test your colors: Use crayons or colored pencils. The colors will be similar to the pens and paints you will use for the final, but crayons and colored pencils will not bleed through the newsprint.
Use 3 colors for your poster design. One color may be black. Use primary or secondary colors, 2 of which contrast. You may need to do a Web search or look in art books to find a chart showing contrasting colors, if you are not familiar with this idea. One example is that blue and orange contrast, so that you could use blue, orange and black.
Here are two Web sites about choosing colors and using contrasting colors.
http://www.sanford-artedventures.com/play/color1/color1.html
http://www.sanford-artedventures.com/study/g_complementary.html
2. Practice a few ideas with paint and markers before you use your best paper.
3. Make your final poster with the largest size poster paper available.
Plan to display your posters during the community celebration at the end of the plant study.
Alternate Activity: You can write and illustrate a seed book for the younger grades. Bind it for use in the school library.
| Active
youth on St. Paul Island are doing something to make a difference
where they live. During years of government operation of the fur seal
harvest, pollution took its toll. Oil contaminated the earth. Refuse
of the business littered the land. Ataqan
Akun, We
are One, Aleut dancers under the supervision of Unangan
educator, Edna Floyd, were glad to help. The wrestling team and a
class of fifth grade students joined the crew with vigor.
They took jobs to help gather seeds native to the island. The seeds they gathered will be sown over large areas. They will repair areas of land where oil contaminated soil was burned and are now devoid of plants. The young people made money to help with their activities by harvesting the seeds of wild grasses, lupines, and St. Paul putchkis. They were hired by Ecotech to do this because 1) it would help the environment and 2) it would allow youth to do real work of great value where they live. Bering Sea Ecotech is a subsidiary company of the TDX. TDX stands for Tanadgusi{, which is the Native village corporation. Ecotech is an environmental clean up company. They have been learning the business the last seven years. They now have jobs across the country. They could have just planted grass seed from the mainland. They did not want to do this because it could destroy the balance of plant and animal life. They made a decision about what should grow in those areas. They are proud to point out that they even used recycled burlap bags that were found in refuse piles to store the seeds for the winter. Qa}aalaku{, thank you, to everyone who worked towards this important goal. Edna Floyd, Unangam Elders' Academy member, St. Paul educator |
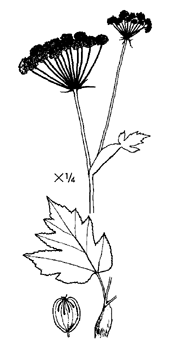
Angelica lucida
Saaqudiigamax E
(UT 353)
Saaquda{ W (UT 353)
Angelica, St. Paul Putchki,
Wild parsnip
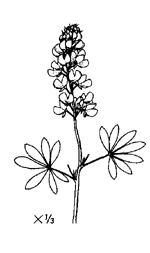 Lupinus
nootkatensis
Lupinus
nootkatensisHani{ E & Attuan (UT 77)
(lake)
Ahni{ W (UT 77)
Lupine
ACTIVITY THREE. You can learn what is in a seed!
|
1. Working with a partner, put 20-25 beans in a cup and cover them with about 2 inches (5 cm. of water). Leave them soaking until the next day. 2. The next day, prepare an examination area. Lay down paper towel on which to place soaked beans. Remove 10-12 beans from the container where they were soaking. Lay 2-3 dry beans near the soaked ones so that you can compare their appearance. 3. Look at one bean (pinto bean or red kidney will most clearly show these details) with your hand lens. Use your other senses to examine the bean. Smell the bean. Feel its surfaces. However, remember that you should never taste any ingredient during a science experiment. |
|
|
What do you see?
- a brown or grayish-white outer coating: the seed coat.
- a scar that is the place where the seed was once attached to the parent plant.
4. Repeat your observations with the rest of the beans
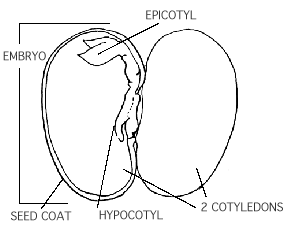
5. Carefully scrape away the outer seed coat with your fingernail.
You will see a white beak-like shape with 2 halves connected at the top. The white structure is the root part (the hypocotyl) of the seed embryo. The embryo is the part of the seed that actually develops into a plant. The 2 halves are the cotyledons; they are also known as the seed leaves and hold the stored food for the growing baby plant.
6. Repeat this observation with the hand lens and the rest of the beans.
7. Carefully pry apart the 2 halves (the cotyledons). Be careful not to break the hypocotyl. Look at each half with your hand lens. With the plant illustration, identify the part of the plant embryo that will become the plant’s stem, leaves, flowers and fruit: the epicotyl.
What is inside the other beans? Repeat step 7, examining the other beans with your hand lens.
8. Fill out the bean report form. If you are looking at more than one kind of bean, fill out a report form for each kind of bean. Be sure to use observation language in this report. What are observation words that you can use to describe the bean? “white,” “5 cm. long,” “smells like old shoes.” What are opinion, subjective words? “stinky,” “tiny.”
ACTIVITY FOUR. You can practice using the “Setting Up Your Experiment” form.
Look at the activity you started for “Dirty a Sock/Clean a Boot.” Using that project, work with your class to fill in the blanks for “Setting up your experiment” on a large sheet of paper that you can see in front of the room. There are forms in the Appendix for you to use.
|
BEAN REPORT FORM Date ___________________________ Name ___________________________________________ Write one or two accurate words to describe each seed you are observing: |
|
|
DRY BEAN Color
_____________________________ |
SOAKED BEAN __________________________
|
|
Draw the dry bean seed
Draw and label the inside of the soaked bean seed using these words:
|
|
ACTIVITY FIVE. You can do an experiment in plant germination and growth.
You will need:
- log book
- pens, pencils
- 12 soaked beans. Select 2 or all of these: pinto, red kidney, lima. Discard any that appear shriveled or rotten.
- water
- watering can with small spout (optional, but helpful for neatness during the activities)
- hand lens
- paper towels
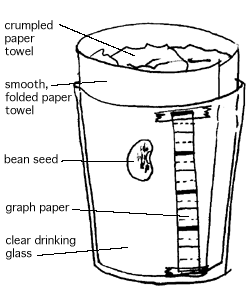
- 12 clear drinking glasses or cups, a minimum of 3 inches tall (76 mm) and all the same type and size.
- one or 2 trays or cookie sheets to hold your team’s planted cups
- graph paper
- refrigerator
Divide into 4 teams. Each team will be responsible for one of the following experiments:
- Do different kinds of beans germinate in different ways?
- Does it matter which direction a seed is planted?
- Does light affect the germination of a bean?
- Do heat and cold affect the germination of a bean?
|
ALL TEAMS: 1. Line the inside of each clear drinking glass with a paper towel that is folded smooth. Then crumple some more paper towel and put it in the glass, all the way to the top. When pushed in place, the bean seed will need oxygen. The seed should not be too tight between the paper towel and the glass. The bean seed be not be too loose, either, and able to slip down the side of the glass. 2. Place a soaked bean between the paper towel and the glass. The bean should be 1/3 to 1/4 of the distance from the top of the glass. Does it matter which way the bean is planted? One team should place the bean seeds in several directions. (See experiment B) 3. Add water to the glass so that the paper is wet, but do not cover the bean seed. Add water every few days to keep the paper moist. 4. Fasten a strip of graph paper on the outside of the glass next to each bean. 5. Teams proceed with differing experiments as follows: |
|
|
A. Do different kinds of seeds germinate in different ways?
What is your hypothesis?
Place glasses with the several kinds of beans in a dark place. On the graph paper outside the glass, record each day’s growth and change. What is the difference after 14 days?
B. Does it matter which direction a seed is planted?
What is your hypothesis?
Your beans should be planted in many different directions. Place the glasses with the several kinds of beans in a dark place. On the graph paper outside the glass, record each day’s growth and change. What is the difference after 14 days? Is there a difference among the beans based on which way they were planted?
C. Does light affect the germination of a bean?
What is your hypothesis?
Place one-half of the glasses with the beans in a dark place. Place the other half in a light place. On the graph paper outside the glass, record each day’s growth and change. What is the difference after 14 days?
D. Do heat and cold affect the germination of a bean?
What is your hypothesis?
Place one-half of the glasses with the beans in a dark place in the classroom. Place the other half in a refrigerator or other cold place. On the graph paper outside the glass, record each day’s growth and change. What is the difference after 14 days?
6. All teams complete the “SETTING UP YOUR EXPERIMENT” pages (see Appendix) for each experiment.
ACTIVITY SIX. You can set up an experiment in plant germination and growth.
Continue working with a partner or in teams to develop an independent experiment. Suggestions follow.
- Research experiment topics in reference sources (your teacher has a list) or on the Internet.
- Select one experiment to complete. Have your teacher approve your choice so that all teams are not doing the same experiments.
- Design your experiment using the “SETTING UP YOUR EXPERIMENT” pages (see Appendix).
- Complete and report on your experiment during the community sharing event at the conclusion of the plant study.
Plant germination and growth experiment topics: (see Resources in the Appendix for help in designing these experiments)
- What is the effect of gravity on a plant root?
- Do seedlings grow better with fertilizer?
- Can plants grow around obstacles?
- Do plants always grow back if they are cut?
- What happens when seed leaves are removed?
- How much of a seed is needed for germination?
- What happens if beans are left covered in water?
- Which part of the embryo in a bean develops first?
- What are the growth rates of other seeds such as corn, sunflower, spinach?
OR
Any other germination, seedling growth experiment you wish to design. You can research experiment topics on the Internet, also.
Remember that seeds need 3 things to germinate:
- the right temperature,
- water, and
- oxygen.
You can design other experiments by changing one of these variables.
EXTENSIONS
ACTIVITY A.
Select one of your experiments and develop it into a Science Fair entry.
ACTIVITY B.
Make a flip book of a germinating seed, and growing seedling. For an example of a flip book, see Alaska’s Tundra & Wildlife, Alaska Wildlife Curriculum Teacher’s Guide. Alaska Department of Fish and Game. 1995. pages 75-76
ACTIVITY C.
Make a seed collage. Find as many different kinds of seeds as you can. Do not use wild seeds. Find seeds around the home that you already have or ask your friends for some. Arrange them in a design on a flat surface and then glue them to the outside of a clean, empty can using a quick-setting glue such as a craft hot glue gun. Give the seed collage as a “thank you” to one of the Elders or experts who helps you with this plant study.
ACTIVITY D.
What are some other seeds in your home? Make a pictorial catalog of the kinds of seeds you find in your home.
ACTIVITY E.
Can plants grow in space? Experiments have been conducted aboard the Space Shuttle Columbia to see if plants will grow in space. Use the Internet to research and report on the success of these experiments.
ACTIVITY F.
The US Department of Agriculture supplies information about growing wild plants. One of the plants it describes is Fragaria chiloensis, Pacific Beach Strawberry. You can find information about this plant and directions for growing it at the PLANTS Web site “http://plants.usda.gov”. In the search prompt box, type in “Pacific beach strawberry”; then choose the pdf. version of the plant guide. If the season is appropriate and you have sufficient specimens of this plant in your area, follow the directions for planting. What other wild plants can you transplant or move into your personal wild plant garden?
| Student
Assessment, Section Three |
Name: ____________________________ | ||
| Date: __________________ | 1. Always | 2. Sometimes | 3. Never |
| I stayed on task. | |||
| I completed my work. | |||
| I asked questions. | |||
| I contributed to my group's work. | |||
| I understand the information. | |||
| I am respectful of Elders and experts | |||
|
I still have questions about:
|
|||